 开发环境准备
原则
工欲善其事必先利其器。再具体深入了解之前,先将开发环境搭建起来.....
# 网络环境
开始搭建开发环境之前,首先配置好自己的网络环境。必须能够访问得了外网,不然,很多依赖,都不能下载。更别谈后面的调试了。
这里我说个我用的吧。Clash (opens new window)。如果自己能折腾的话,买服务器,自己搭。如果不想折腾,就买个吧。多少花点。
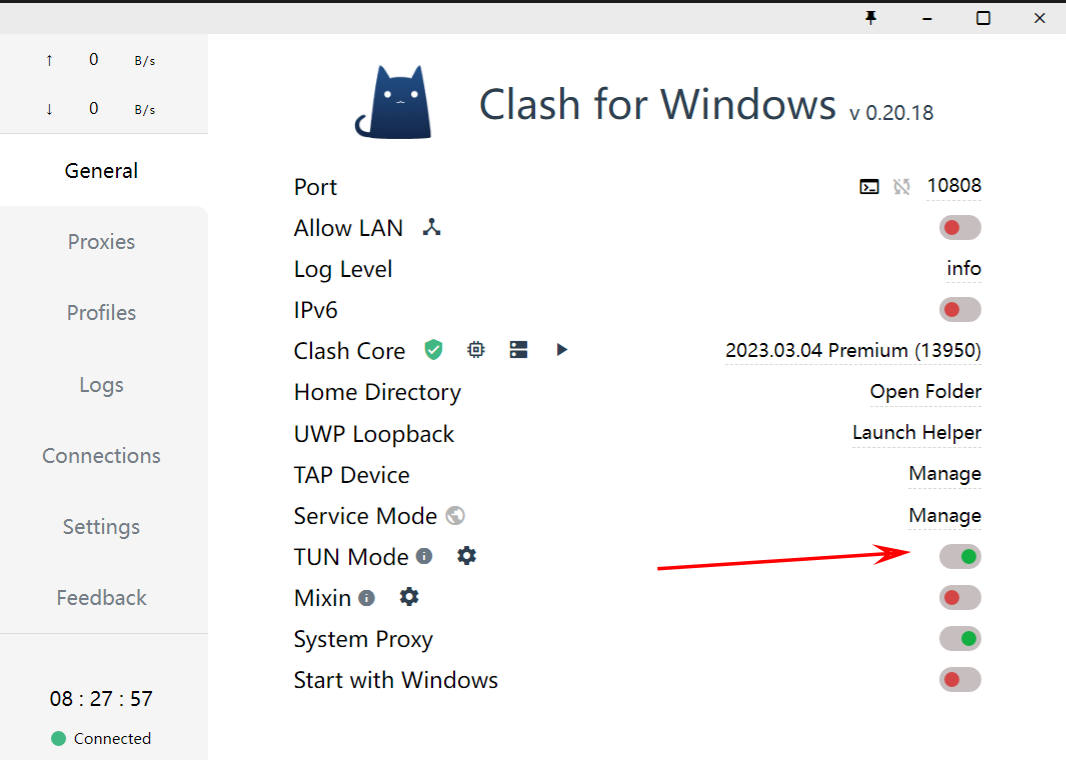 假设已经安装好了clash, 并且浏览器已经能够访问
https://www.google.com, 现在打开TUN Mode。详细配置文件 (opens new window)
注意
必须以管理员的身份运行,不然,会没有权限,不能代理全局流量的。
执行curl -vv https://www.google.com , 看是否能够连接。不能ping, ICMP协议不代理的。
curl -vv https://www.google.com
*   Trying 198.18.0.33:443...
* Connected to www.google.com (198.18.0.33) port 443 (#0)
* schannel: disabled automatic use of client certificate
* schannel: ALPN, offering http/1.1
* schannel: ALPN, server accepted to use http/1.1
> GET / HTTP/1.1
> Host: www.google.com
> User-Agent: curl/7.79.1
> Accept: */*
2
3
4
5
6
7
8
9
10
网络环境配置到此结束。下面开始搭建开发环境。
# 开发环境
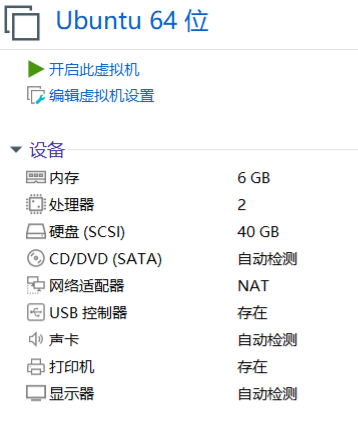
我的主力笔记本就是一台win10的小米笔记本。开发凑合着用,但很多时候环境当然是在Linux下最好,最后部署都是在以Linux为主的服务器或者云服务器。另外一个原因,就是不想把我本地的环境搞乱了,所以,我准备了个虚拟机来开发。
# VMWare workStation
- 版本说明:16.2.5
- 下载地址 (opens new window)
- 激活码就自己在网上找一个吧。
# Ubuntu
- 版本说明:
- 下载地址 (opens new window)
下载完成之后,就是按照配置说明一步一步将安装起来吧。这里配置的话,我本地给了6G内存,40G硬盘,看个人需要吧。
个人创建用户后,进去一定给`root`用户设置一下密码,不然后面权限问题很难弄。
给root用户设置密码:sudo passwd root
# Open JDK
因为Java, 所以我们相聚在这里🤣。Java每年都在发版本,不知道你是否还是Java8。(版本任你发,我用Java8), 大人,时代变了。没有万精油的工具。
现在,让我们把目光转移到17 (opens new window)。JDK 17 will be a long-term support (LTS) release from most vendors.
tar xvJf  xxx.tar.xz

export JAVA_HOME=/usr/local/jdk
export CLASSPATH=.:$JAVA_HOME/lib
export PATH=.:$JAVA_HOME/bin:$JAVA_HOME/lib:$PATH
2
3
4
5
# 依赖管理工具
国内而言呢,都是maven一把索。gradle很多都是Android的项目再用。不过随着Gradle的持续发力,在依赖管理这一块,对maven造成了不少了压力。基本就是这两家了。
Gradle官方还整个对比Gradle vs Maven Comparison (opens new window),这不杀人还要诛心嘛🤭
不过,神仙打架,凡人遭殃呀。他们整的火热了,我们卑微打工人又有的学了😭。先装环境吧......
# Gradle
- 下载地址 (opens new window)
- 安装 (opens new window) 安装很简单,下载指定文件夹,解压,然后在环境变量里面指定就行
 mkdir /opt/gradle
$ unzip -d /opt/gradle gradle-8.0.2-bin.zip
$ ls /opt/gradle/gradle-8.0.2
LICENSE  NOTICE  bin  getting-started.html  init.d  lib  media

$ export PATH=$PATH:/opt/gradle/gradle-8.0.2/bin
2
3
4
5
6
Gradle + Kotlin = ⚡️ 🚀️
Kotlin + Gradle: a technology combination sure to foster developer happiness and productivity.
# Maven
- 下载地址 (opens new window): maven archive, look for you need. enjoy it🥳
- 安装
export MAVEN_HOME=/usr/local/maven/apache-maven-x.y.z
export PATH=${MAVEN_HOME}/bin:${PATH}
2
从官网的风格其实能看出来,maven (opens new window)更加有历史感,gradle (opens new window)更加小清新,更加年轻化。
怎么说呢:
对maven而言,一句:廉颇老矣,尚能饭否🍜
对gradle而言,一句:冯唐易老,李广难封🏹
对于工具人而言,一句:海阔凭鱼跃,天高任鸟飞🌊
# Quarkus
# What is quarkus?
Quarkus (opens new window) is a Cloud Native, (Linux) Container First framework for writing Java applications.
- Container First: Minimal footprint Java applications optimal for running in containers.
- Cloud Native: Embraces 12 factor architecture (opens new window) in environments like Kubernetes.
- Unify imperative and reactive: Brings under one programming model non-blocking and imperative styles of development.
- Standards-based: Based on the standards and frameworks you love and use (RESTEasy and JAX-RS, Hibernate ORM and JPA, Netty, Eclipse Vert.x, Eclipse MicroProfile, Apache Camel...).
- Microservice First: Brings lightning fast startup time and code turnaround to Java apps.
- Developer Joy: Development centric experience without compromise to bring your amazing apps to life in no time.
All under ONE framework.
# Get start......
curl -Ls https://sh.jbang.dev | bash -s - trust add https://repo1.maven.org/maven2/io/quarkus/quarkus-cli/
curl -Ls https://sh.jbang.dev | bash -s - app install --fresh --force quarkus@quarkusio
2
We just stop here, still have lots of chances to try it's features.
# Dapr
# What is Dapr?
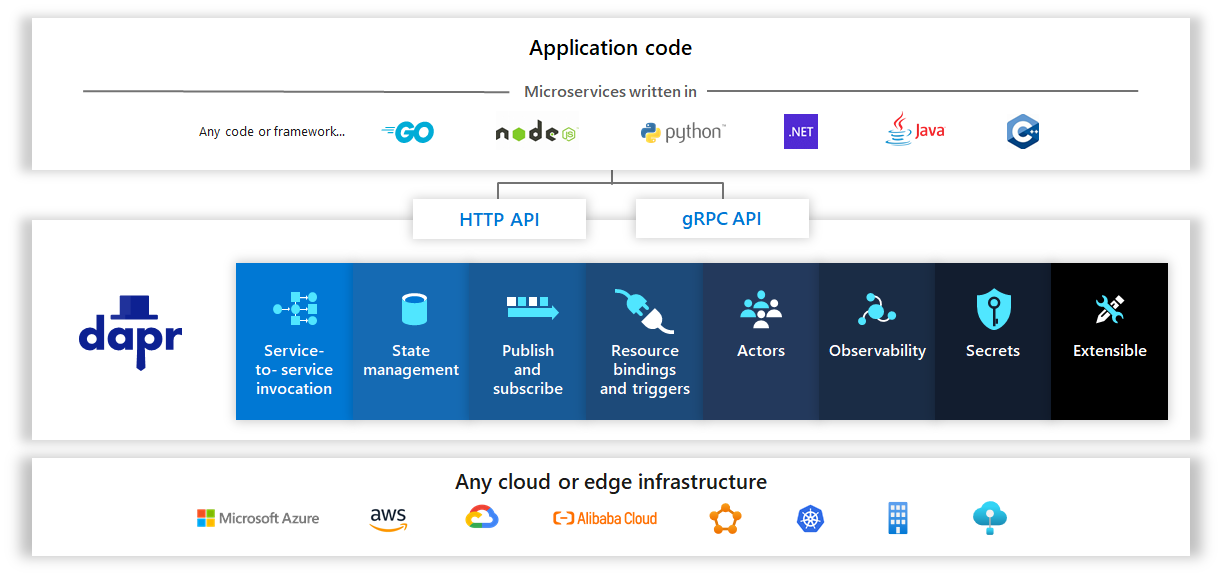
Dapr (opens new window) is a portable, serverless, event-driven runtime that makes it easy for developers to build resilient, stateless and stateful microservices that run on the cloud and edge and embraces the diversity of languages and developer frameworks.
Dapr codifies the best practices for building microservice applications into open, independent, building blocks that enable you to build portable applications with the language and framework of your choice. Each building block is independent and you can use one, some, or all of them in your application.
# Get start......
- install and init
wget -q https://raw.githubusercontent.com/dapr/cli/master/install/install.sh -O - | /bin/bash

dapr init
2
3
Tip
Docker needs to be installed
# NATS
# What is NATS?
NATS (opens new window) is a simple, secure and performant communications system for digital systems, services and devices. NATS is part of the Cloud Native Computing Foundation (CNCF (opens new window)). NATS has over 40 client language (opens new window) implementations, and its server can run on-premise, in the cloud, at the edge, and even on a Raspberry Pi. NATS can secure and simplify design and operation of modern distributed systems.
# nats-server
curl -L https://github.com/nats-io/nats-server/releases/download/vX.Y.Z/nats-server-vX.Y.Z-linux-amd64.zip -o nats-server.zip
unzip nats-server.zip -d nats-server
sudo cp nats-server/nats-server-vX.Y.Z-linux-amd64/nats-server /usr/bin
2
3
version
here is the archive (opens new window), notice the version.
# nats-tool
curl https://github.com/nats-io/natscli/releases/download/v0.0.35/nats-0.0.35-linux-amd64.zip
unzip
cp nats /usr/bin
2
3
# Docker
Install Docker Engine on Ubuntu (opens new window)
# Install using the apt repository
Before you install Docker Engine for the first time on a new host machine, you need to set up the Docker repository. Afterward, you can install and update Docker from the repository.
# Set up the repository
- Update the apt package index and install packages to allow apt to use a repository over HTTPS:
 sudo apt-get update
 sudo apt-get install \
    ca-certificates \
    curl \
    gnupg \
    lsb-release
2
3
4
5
6
- Add Docker’s official GPG key:
 sudo mkdir -m 0755 -p /etc/apt/keyrings
 curl -fsSL https://download.docker.com/linux/ubuntu/gpg | sudo gpg --dearmor -o /etc/apt/keyrings/docker.gpg
2
- Use the following command to set up the repository:
 echo \
  "deb [arch=$(dpkg --print-architecture) signed-by=/etc/apt/keyrings/docker.gpg] https://download.docker.com/linux/ubuntu \
  $(lsb_release -cs) stable" | sudo tee /etc/apt/sources.list.d/docker.list > /dev/null
2
3
# Install Docker Engine
- Update the
aptpackage index:
sudo apt-get update
Receiving a GPG error when running apt-get update?
Your default umask may be incorrectly configured, preventing detection of the repository public key file. Try granting read permission for the Docker public key file before updating the package index:
 sudo chmod a+r /etc/apt/keyrings/docker.gpg
 sudo apt-get update
2
- Install Docker Engine, containerd, and Docker Compose.
To install the latest version, run:
sudo apt-get install docker-ce docker-ce-cli containerd.io docker-buildx-plugin docker-compose-plugin
List the available versions:
apt-cache madison docker-ce | awk '{ print $3 }'
Select the desired version and install:
  VERSION_STRING=5:20.10.13~3-0~ubuntu-jammy
  sudo apt-get install docker-ce=$VERSION_STRING docker-ce-cli=$VERSION_STRING containerd.io docker-buildx-plugin docker-compose-plugin
2
// Make sure to add code blocks to your code group
- Verify that the Docker Engine installation is successful
docker --version